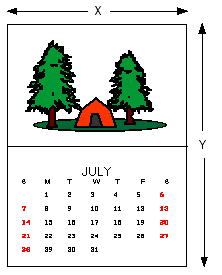
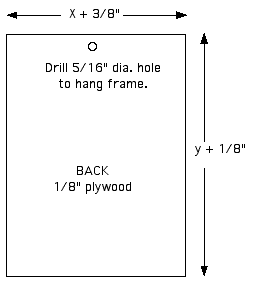
This frame can be made from either hardwood, oak, maple etc. or a softwood such as pine, the back is not seen so can be any 1/8" thick plywood or a scrap of panelling. The calendar slides into the slots cut in the frame, and is removed to change the month. Tools Required: Table Saw, hand drill, 5/16" & 1/4" drill bits, router (optional), bar clamps. Material Required: 1/8" thick plywood for back 3/4" X 1 1/4" stock for frame sides and bottom 3/4" X 2 1/2" , or wider for top 1/4" dowels Start by determining the size of the back of the holder. Lay the calendar to be framed out flat unfolded, measure the width and length. Cut the back out of 1/8" thick plywood, drill a 5/16" dia. hole to hang the calendar at the top edge of back as shown.
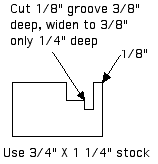
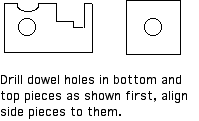
Next determine the length of the two side pieces and the bottom of the frame, the side pieces will be 3/4" longer than the length of the back, the bottom and top will be 11/16" less than the width of the back. Cut the profile for these pieces as shown below, then trim to size. Note that the bottom piece has a pencil groove, this can be done with a router or the table saw.
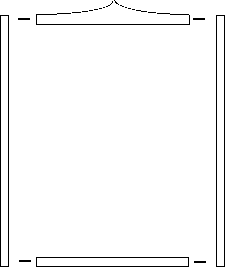
The top piece of the frame can be made from wider material 3/4" thick, the top edge can be shaped to a point or rounded at the center, just make sure the ends are tapered to 3/4" wide.
|


