Simple Sawhorse
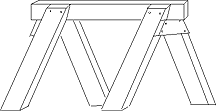
This sawhorse is made from 2 X 4's, the top can be any length, over 32" is recommended so it will hold most doors to work on them.
|
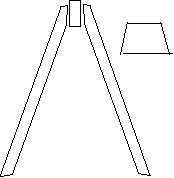
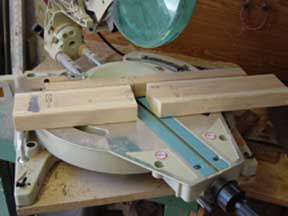
Getting Started Make four legs for each sawhorse marking them off with a 24" carpenters square, place the 24" mark and 8" marks at the bottom of a 2 X 4 as shown, make the cuts, then cut the point off as shown below. Fasten the four legs to the top, about 3" in from each end, then placing a piece of plywood under the top on each end mark off the angles to cut for the leg braces. A second brace can be added half-way down the legs for added strength.  Cutting legs with miter saw. Although this is a simple design cutting the top oblique angle on the legs has always presented a bit of a problem, until I made this jig I had always used a hand rip saw. Cut both ends of the 2X4 at 20 degrees, the overall length should be about 26". Make the cut with the 2X4 on edge so you swinging the saw to the 20 degree mark rather than tilting the saw with the 2X4 flat.
Make a jig to cut the top angle using 2 short 2X4's and a 2X2 as shown in the photo below. Place a leg in the slot with the saw still set at 20 degrees, the short side of the top of the leg should be to the left, when you make the first cut you will slice a bit off the 2X4 on the right and cut into the 2X2, stop before you cut all the way through it. This cut is more of a rip cut than a crosscut, make sure the leg is secure in the jig and slowly make the cut, most blades are not designed for this so will not be that aggressive.
See also: Sawing Trestle, a similar but more intricate design from the early 1900's. Wide top sawhorse, great for hand sawing. |


