"Helping woodworkers for over 20 years"
Simple Router Table
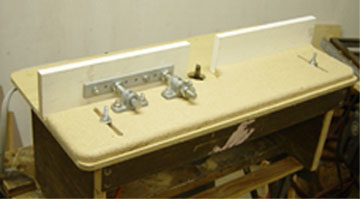
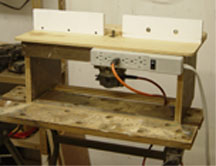
| This router table sits on a Workmate, it is suitable for most small routers and can be made very easily, a powerbar can be fastened to one end and used as a switch for the router. Always remember to unplug the router when changing bits. The top hangs over the frame at the ends so a board can be clamped to it for a fence if you don't make the one shown below. The dimensions are only suggested, they can be altered to make use of material you have on hand. |
Material list
28 ea. - # 8 X 1 1/2" flat head wood screws.
2 ea. - Flat head bolts with nuts to fit holes in router base.
Power bar to mount for switch. (Check power rating if using large router, you may have to use a heavier type of switch.)
Tools Required
Saw, drill, screwdriver.
Asembly
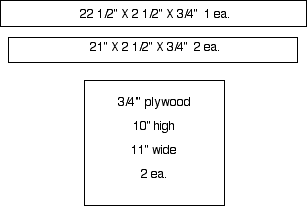
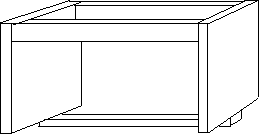
Cut the frame pieces as shown and assemble as above.
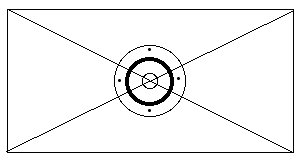
Remove the motor from the router base, center the base on the back of a peice of 1/2" thick plywood or MDF and mark the center hole and outside mounting holes, drill the holes, the large center hole can be cut out with a jig saw, or the router with a straight bit if you don't have a large enough drill bit. Countersink the mounting holes for flat head screws to mount the router.
Fasten the top to the frame with countersunk screws.
Top With Miter Slot and Plate
If you wish to incorporate a plate for your router a very simple top can be made that includes
a slot for the miter gauge from your table saw.
Make a base from 3/4" thick material to the size you require. Using 3/8" thick material such as MDF cut
a second panel the same width, the length will be the width of your miter gauge plus 1/8" shorter than
the 3/4" panel. Cut the insert for the router plate in the thinner panel toward one end, then cut a smaller
opening in the 3/4" panel so there is a lip to support the plate. Make a square cut across the thinner panel
about 1" away from the router plate. Glue the section with the opening to the base, place the miter gauge
bar against the thin panel and glue the other section of the panel in place. You may have to shim the router
plate to make it level with the table top.
Router plates are available made from Phenolic or Aluminium material from Rockler.com
Router Fences
Due to the fact material can be fed into a router bit from any direction making a basic fence can
be as simple as clamping a board to the table. An easily adjusted style can be made by fastening
one end so it will pivot and simply clamping the other end to the table. A strip of T-track inserted
into the table will make it much easier to mount guides, etc.
With this split fence and a straight bit your router will work as a jointer to straighten boards.
Making the Fence
Cut the base from 3/4" MDF to the dimensions shown.
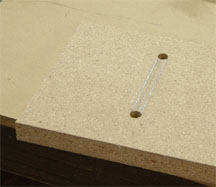
Cut 3" long X 5/16" wide slots in each end of base, 2 3/4" from the end and 3/4" from back edge.
Round over all top edges except edge for rear guide.
Cut two pieces for the front and rear guides from 3/4" MDF.
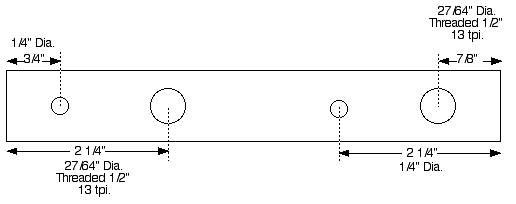
Pattern for metal bar
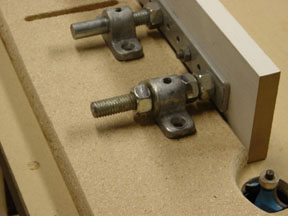
The rear guide is fastened directly to the base, the front guide is adjustable, use the hardware shown, that consists of two 1/2" diameter pillow blocks, metal bar 6 7/8" long by 1" wide by 1/4" thick, 3 1/2" length of 1/2" ready rod, 3" bolt 1/2" in diameter with head cut off, and four 1/2" hex nuts. The metal bar actually only needs four holes drilled in it, the extra holes just happened to be in the piece that I used, there is a pattern above.
Drill and thread the bar as shown, turn a nut on to the length of ready rod then screw it into the hole that is 7/8" from the end of the bar, tighten the nut to lock the rod in place. Turn a nut on to the cut off bolt and screw it into the hole 2 1/4" from the end and lock it with the nut.
Add another nut to the ready rod, slip one of the pillow blocks on to it then add a second nut.
Slip a pillow block on the other stub, set the assembly on the base as shown, mark the holes to fasten the side guide to the bar, drill two 1/4" holes then with a 5/8" spade bit drill an insert for the bolt heads in the face of the side guide, fasten the guide to the metal strip with 1/4" X 1 1/2" carriage bolts.
With the guide against the edge of the base drill the 1/4" holes for the pillow blocks, turn the base over and drill 5/8" insert holes for the 1/4" X 1 1/2" carriage bolts.
Fasten the other guide to the rear edge of the base with three #8 X 1 1/2" screws, countersinking the heads.
Position the fence on the router table so the guides line up with the router bit, drill a 1/4" hole in the center of the slots through the top of the router table, insert a 1/4" x 2" carriage bolt at each end with a flat washer and wing nut.
Add gussets to the rear fence fastening with glue and brads, cut a third gusset 1/2" shorter and glue to the base only in line with the end of the front guide. I trimmed a 1/2" strip off a foam paint brush and glued it to the edge of the gusset to fill the space between it and the guide.
Dust Collection
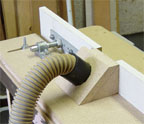
Make a cover to go over the two gussets at the split in the fence, note the notch in the top corner to clear the adjustable guide. Drill a hole to fit the size hose you are using on your vacuum system. Fasten the cover in place with screws, I glued mine but now realize I may wish to change it when my dust collection system is updated.
Setting Up The Fence
Start with the adjustable guide at least 1/8" inside the rear guide with a straight edge along them, loosen the nut on the inside of the pillow block and tighten the nut on the outside. With the straight edge in position against the rear guide move the fence so the straight edge is in line with the outer most radius of the cutting edge of the router bit. There should be a space between the straight edge and the front guide, this will be the depth of the cut, move the guide out until there is about 1/16" space. This distance will depend on the hardness of the wood and the power of the router so you may have to make further adjustments in different situations.
More tips and safety information on routers.
More Free Router Table Plans from AbsolutelyFreePlans.com

