
Using a Coping Saw
A coping or fret saw is a great introduction to woodworking, it is both inexpensive and a quiet hobby that can be done practically anywhere with rewarding results. Solid woods such as pine and spruce are a good choice to start out on as well as the thinner selections of Baltic Birch plywood. Care has to be taken, as with any sharp cutting tool, but the risk is minimal when using a coping saw properly.
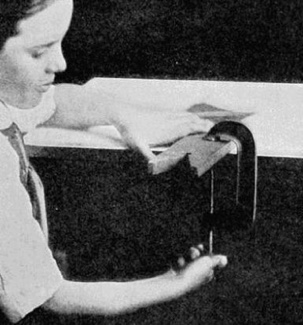
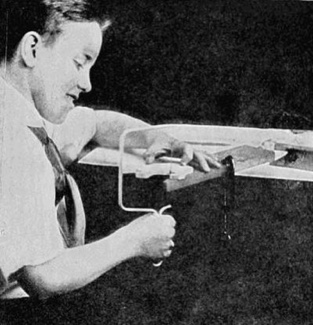
A saw board should be fastened to a table top with an iron clamp; or, a saw board made to fasten in a vise may also be used. When cutting the coping saw should be held in a vertical position, with an up-and-down motion with short fast strokes follow the outline carefully. Cut on the line. Do not press hard on the saw for the blade is very thin and can very easily be broken, but it should last a long time if used correctly. When cutting a sharp turn in the wood with the coping saw, care should be taken not to twist the saw blade out of shape. Upon reaching the sharp turn, continue the up-and-down motion, but without doing any cutting; turn the wood very slowly until you have made the complete turn, then continue with the sawing and follow the rest of the outline carefully. When an opening is to be sawed out, bore a hole in the middle of the part to be cut out, remove the blade from the upper part of the frame, while holding it in place in the lower part with the thumb of the right hand. Slip the blade thru the hole from below, and replace it in the slot while pressing the upper part of the frame against the edge of the desk as shown below. When the opening has been cut, the saw may be removed by reversing the operation.
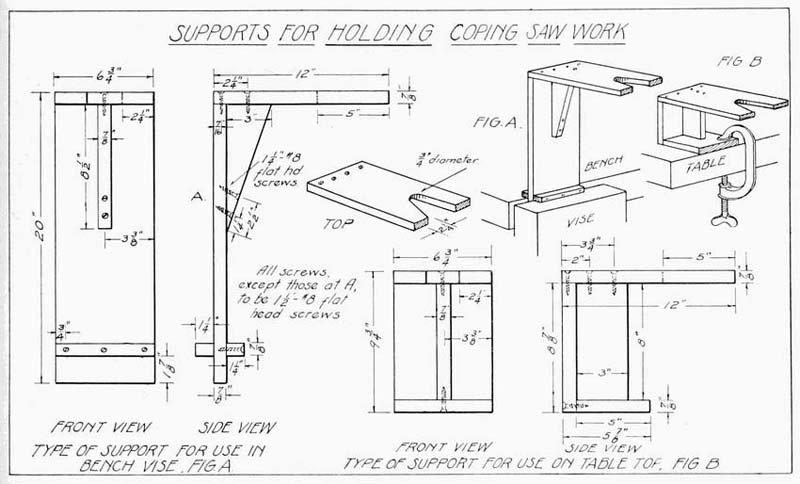
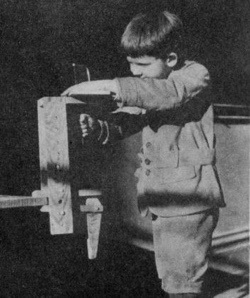
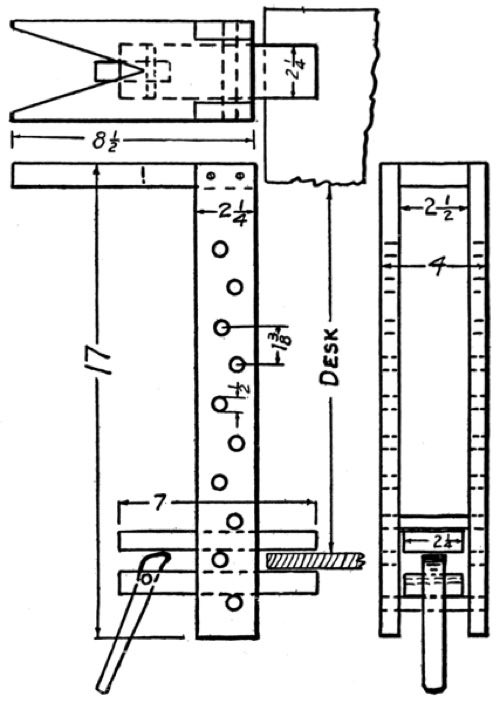
Basic Sawing BoardsShown beloware two devices for holding work while using the coping saw. Fig. A is a type of support suitable for use in a vise and is of a height that will enable the user to stand while sawing. Fig. B is lower, and the sawing is done while sitting in a chair. This type is designed for use where there is no vise and is held secure by a clamp, as is shown in the sketch. Note: This is information sourced from a time when standard lumber dimensions were larger, today's standard material may be substituted.
SUPPORT TO BE HELD IN VISE. In making this support the following method should be followed: The two small cleats are 7/8" × 1-1/4" × 6-3/4" and are
attached to the upright piece 1-7/8" up from the bottom edge. This
allows the support to set firmly in the vise. Measure in from one end of
the top piece 5" and have this point come half way between the sides.
At this point a hole is carefully bored with a 3/4" bit. On this same
end measure in from each edge 2-1/4". From these points draw lines
tangent to the edges of the circle, as shown. Cut out this V-shaped
notch. SUPPORT FOR TABLE USE. For the support shown in Fig. B, we make the upright 7/8" × 6-3/4" × 8-7/8". The top is cut 7/8" × 6-3/4" × 12" and the base 7/8" × 5" × 6-3/4" and the upright brace 7/8" × 3" × 8". The top has the same V-shaped notch cut in it as the other form of support. Bore all necessary holes, sandpaper and assemble. The clamp shown in the sketch answers the purpose very nicely and may be purchased for a small sum at any hardware store. Adjustable Sawing Board
|

 |
Carpentry For Boys by J.S. Zerme, M.E. - online reprint
A book which treats, in a most practical and fascinating manner all subjects pertaining to the "King of Trades"; showing the care and use of tools; drawing; designing, and the laying out of work; the principles involved in the building of various kinds of structures, and the rudiments of architecture. It contains over two hundred and fifty illustrations made especially for this work, and includes also a complete glossary of the technical terms used in the art. The most comprehensive volume on this subject ever published for boys. |
|
|