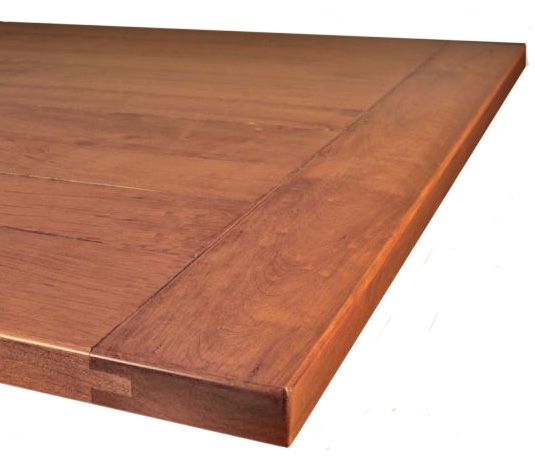
Breadboard Ends
Breadboard ends are not only attracrive, they also help to keep your glue up flat.
A breadboard end is basically a tongue that fits in a groove in a board with the grain running in the opposite direction to the boards in the top. With boards running in two directions there has to be an allowance for the top to expand or contract across the grain within the groove of the end board.
This is accomplished by securing the end to the tongue in the center while allowing it to move in slotted holes at each edge. The tongue and groove can be cut either with a dado blade on your table saw or with a router and straight bit, preferably in a table.
Another option is to make a blind groove, the easiest way to do this is to drill a hole at one end slightly larger than the width of the groove. This will allow you to drop the board over the bit that is set up in a router table with a fence to guide the cut and a stop at the other end. Take several shallow cuts rather than one deep cut.
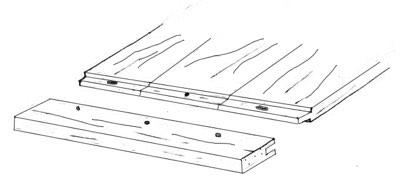
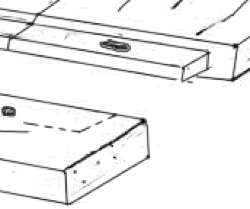
When the tongue and the groove are cut put them together and clamp the end board so it is tight to the shoulder of the tenon. You may use either screws or dowels to secure the end boards
Mark the position of the holes on the back of the top, drill the holes to the size required for the fastening method, do not drill all the way through. Remove the end board and elongate the outside holes in the tongue. The center may be glued in addition to the fastener, do not glue the outside ones they must be free to move.
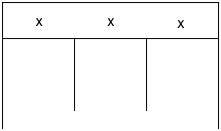
An Alternative method is cut cut a narrow groove
for the haunch on the table end and deeper mortises for longer tenons
as shown by the solid grey area. The mortises need to be cut wider than
the width of the tenons to allow for expansion. 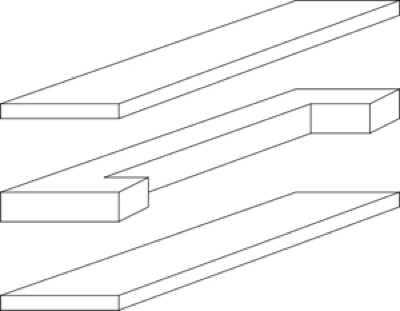
If you are not confident at cutting mortises make a
three piece end, made from the same material the glue lines will not be
obvious.
|

|
|